Annoyance, colored diffs in perforce

February 1, 2010

Quick one-off here, let’s begin.

Git has nice colored diffs, like this:

Perforce does not:

A simple script can remedy this:

Here’s the script:

Simply drop it somewhere in your $PATH and use it like so:

p4 diff | p4c.rb

You can find it in my one-offs directory (it’s called p4c.rb). We recently switched from subversion to perforce (definitely not my choice, I pushed for git), and so far it’s awful. I am definitely not a fan. This makes it a little better.

CBench, simple benchmarking for Clojure

December 9, 2009

How many times have you written something like this in Clojure when you’re trying to benchmark some code:

(time (dotimes [_ 10000] (my-function arg1 arg2 arg3))

I normally end up writing something equivalent to that all the time to test reflection vs. type-hinted Clojure code, subtle tweaks and other things. Well, I finally got fed up extrapolating the information I wanted from the output of time (and time didn’t expressly return a number I could do anything with, just printed a string), so I wrote a small library for doing benchmarks a number of times. I called it CBench because I couldn’t think of anything that sounded Clojure-ish (bench-jure? clo-bench? etc).

Anyway, jumping straight in, here’s how it’s used, let’s say you have a couple of functions you want to test (super-simple examples):

(defn inc-no-hint [n] (inc n))
(defn inc-with-hints [#^Integer n] (inc n))

With cbench, you can perform benchmarking with a number of iterations. CBench provides 2 functions: cbench and cbench-pp. cbench-pp performs exactly like cbench, but prints a nice display instead of returning a vector of results. In this example, we’ll use cbench-pp:

(use 'cbench) ; cbench.jar must be in your classpath
(cbench-pp 10000 #(inc-no-hint (rand-int 100)))
(cbench-pp 10000 #(inc-with-hints (rand-int 100)))

Run this in a REPL (or a script), and you’ll see this output:

-----------------------------------
| avg    | 0.0161 ms
| min    | 0.0 ms
| max    | 26.0 ms
| stddev | 0.17861615575831605 ms
| total  | 570 ms
-----------------------------------
-----------------------------------
| avg    | 0.0012 ms
| min    | 0.0 ms
| max    | 8.0 ms
| stddev | 0.04897999523196905 ms
| total  | 238 ms
-----------------------------------

CBench gives the average time a run took, minimum, maximum, standard deviation and total time for running 10000 runs of each function. In this example we can see that type-hinting has made a > 10x improvement in average run time (note: this is a contrived example which doesn’t actually mean much other than hinting is faster than non-hinting).

If we wanted only the results as numbers, use the cbench function, in a REPL you can see the output:

user=> (cbench 10000 #(inc-with-hints (rand-int 100)))
[0.0032 22.0 0.0 0.07995998518952234 52]

The result is a vector (in the same order as the pretty-print version).

If you’re interested, the library is available from Clojars.org here, you can get just the jar, or you can check out the source code at the Github project page. Feel free to drop me an email, IM or github message if you like/dislike the library.

Oh yea, and on a non-technical note, I started a Tumblr blog so I can paste things I find interesting of a non-technical sort. If you’re into that sort of thing, feel free to check it out.

Building a Google Wave robot in Clojure

October 29, 2009

I’ve seen a few different posts circulating around on how to build a robot for Wave in Clojure, so I’ll throw mine in the pool.

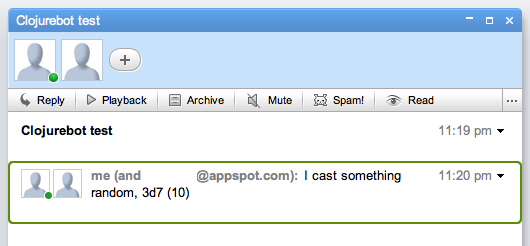
I started off creating a text-replacement robot in Java, but decided to switch it over to Clojure and to make something semi useful. I ended up making a robot to calculate Dungeons & Dragons dice rolls (so something like ‘3d8′ means roll an 8-sided die 3 times and add the results). The idea being you could type something like:

“I cast Magic Missle, 2d6″

and this robot would replace it with the text:

“I cast Magic Missle, 2d6 (5)”

Where 5 is the number that was given. See screenshot below:

clojurebot

So, let’s go through how to make this robot. I’m going to end up skipping most of the gritty details of getting the actual robot set up and refer you to this well-written post about the subject, be sure to follow all the instructions and you should have a usable clojure-bot for Google Wave. This post will cover a basic explanation of the (basic) code used for the actual robot.

Finished reading the other post and playing with the code? Cool, here’s what my servlet.clj looks like:

So, let’s go through each function and explain it.

(ns bibly.servlet
  (:gen-class :extends com.google.wave.api.AbstractRobotServlet)
  (:import
    [com.google.appengine.api.users UserServiceFactory]
    [com.google.wave.api Blip Event EventType RobotMessageBundle TextView Wavelet])
  (:require 
            ))

The (ns bibly.servlet) code puts us into the bibly.servlet namespace and inside that namespace, we’re doing 3 things:

1. Generating a class that extends Google’s AbstractRobotServlet class. (Exactly what you would do in order to build a robot in Java).
2. Importing Google’s java object
3. Requiring the parts of the clojure-contrib library that we need.

(defn blip-submitted-events
  [events]
  (filter (fn [e] (= (EventType/BLIP_SUBMITTED) (.getType e))) events))

This function (taken directly from spanx) is a filter that returns only the events that match EventType.BLIP_SUBMITTED.

(defn roll-die
  "Roll a die with  sides."
  [sides]
  (+ 1 (rand-int sides)))

This function returns a dice roll (Integer) for a die with <sides> sides. (I removed the commented out line)

(defn calculate-rolls
  "Given a re-pattern match group, calculate the dice roll"
  [txt]
  (let [string (first txt)
        dice (Integer. (second txt))
        sides (Integer. (nth txt 2))]
    (str string " (" (reduce + (take dice (repeatedly #(roll-die sides)))) ")")))

Calualte-rolls is the main function for determining the roll, a vector is passed in, that looks like ["1d6" "1" "6"], this function then assigns each of the 3 values to a variable. Calculate-rolls then repeatedly calls (roll-die sides) dice times, reducing the list of results by adding them together. For example, if this function were passed [“2d4″ “2” “4”] , it would take a list of 2 (dice) rolls of a die with 4 (sides), and add them together to get the new value.

After reducing to the result integer, a string concatenating the result to the new string is returned. So for the example vector ["1d6" "1" "6"] (roll a 6-sided die once), the result would be a string: "1d6 (4)".

(defn roll
  "Given a text DnD dice roll, replace it with the calculated result."
  
  (str-utils2/replace text (re-pattern #"(\d+)d(\d+)") calculate-rolls))

The roll function takes a string containing a XdY statement, and expands the roll inside of the string.

(defn replace-rolls
  "Replace all the rolls in a given blip."
  [blip]
  (let [view (.getDocument blip)
        text (.getText view)]
    (.replace view (roll text))))

Replace-rolls does the exact thing roll does for a string, just doing it for a given blip. First we get the document contained by a blip, and the text in that document, then replace it with the text that the (roll "...") function returns.

(defn -processEvents
  [this bundle]
  (let [wavelet (.getWavelet bundle)]
    (doseq [event (blip-submitted-events (.getEvents bundle))]
      (replace-rolls (.getBlip event)))))

Finally, the -processEvents function, which is the function google wave automatically calls when a capability matching those in capabilities.xml happens, is this function we perform the (replace-rolls ...) function on the list of events filtered by the (blip-submitted-events ...) function.

Well, I hope this example makes sense. Again, 95% of the work for this goes to Spanx‘s post for getting the initial setup, I figured it would be nice to have another example explaining the actual Clojure code for a simple robot’s inner workings.

You can download the code for this DnD robot from my github project, or Spanx’s censorbot example from his github project.

This example isn’t perfect, it needs a lot of work before it’s actually useful, but I thought it was neat.

Process pooling with a Rinda Tuplespace

August 25, 2009

I going to talk about how I’m doing the process pooling in Forkify in this post, so let’s get started.

Feel free to look up the code or fork the project from the Github Forkify project.

The case for pool forking

So, why even do pooling instead of serial forking? Let’s look at an example:

[1, 2, 6, 1, 2, 3].forkify(3) { |n| sleep(n); }

What happens in the background when this is run – forkify will fork 3 processes at a time, each one sleeping for the array’s number, so for the first pass 3 processes will be created, sleeping for 1 second, 2 seconds and 6 seconds (respectively). Forkify will then do a Process.waitpid(<pid>) on all 3 of the processes.

It will end up waiting a tiny bit over 6 seconds (because the longest process will take 6 seconds to finish).

Next, it will create 3 more processes, which will sleep for 1, 2 and 3 seconds respectively.

This will take a bit over 3 seconds.

So, the total time will end up being a little over 9 (6 + 3) seconds (the extra is overhead). Seen here:

% time ruby -I lib -rforkify -e '[1, 2, 6, 1, 2, 3].forkify(3) { |n| sleep(n); }'
0.08s user 0.10s system 1% cpu 9.131 total

How it works with a pool

Let’s take the same example and see how it works for pool forking:

[1, 2, 6, 1, 2, 3].forkify(:procs => 3, :method => :pool) { |n| sleep(n); }

First, 3 processes will be created to perform duties, they will be given 1, 2 and 6 seconds to sleep for. The parent thread will immediately wait for them to finish. The first process will sleep for 1 second, check for work, grab another ‘1’ from the Tuplespace and start doing the work immediately. This will continue with the second process (which will finish after 2 seconds and grab more “work to be done” from the Tuplespace).

This ends up taking less time because you don’t block waiting for 1 process that takes a tremendous amount of time while the others have been finished for a while:

% time ruby -I lib -rforkify -e '[1, 2, 6, 1, 2, 3].forkify(:procs => 3, :method => :pool) { |n| sleep(n); }'
0.12s user 0.11s system 2% cpu 8.380 total

Not a lot of difference huh? A lot of the different has to do with the overhead for creating a Tuplespace and sharing it between processes, here’s a better example (pool first, then serial):

% time ruby -I lib -rforkify -e '[1, 1, 6, 1, 5, 1].forkify(:procs => 3, :method => :pool) { |n| sleep(n); }'
0.12s user 0.10s system 3% cpu 7.157 total

% time ruby -I lib -rforkify -e '[1, 1, 6, 1, 5, 1].forkify(3) { |n| sleep(n); }'
0.08s user 0.10s system 1% cpu 11.112 total

Imagine if the array had 100 items in it, but only a few took a really long time to process, as the differences increase, pool forking makes more sense to do.

How it works in the code

The Parent’s job:

(This is extremely stripped down to illustrate what’s happening)

The key here is to make sure that all the work items are in the TupleSpace before forking any children, so they don’t pull while we’re in the middle of writing and mess up the order, this is why I write all the tuples before starting the DRb service with the TupleSpace object.

After starting the children, I only need to wait on 3 pids, then I retrieve the results from the same TupleSpace in the correct order (regardless of the order they were added in)

The Child’s job:

(Again stripped down to essentials)

The interesting parts of this are the TupleSpaceProxy and being able to write objects to a TupleSpace without any kind of mutex. Rinda’s TupleSpaces take care of doing operations multi thread/process-safely, so I don’t have to worry about synchronizing the writing/taking of items out of the TupleSpace.

The child pulls items out of the TupleSpace, calls the block on them and writes the result tuple back into the same TupleSpace, since it’s shared over DRb the parent will be able to see all of the result tuples when it grabs the results.

Are there problems with this code? Yes – hardcoding a port is a bad idea and I’ve run into some issues with deadlock if 2 pooled forkifys are run immediately after each other (even a ‘puts “foo”‘ in between them fixes the problem, which makes me crazy when debugging). I also imagine that while the forkify itself works with processes, it is (ironically) not actually thread or process safe (because of the DRb hardcoded port amongst other things).

So, does anyone have any ideas of how I can do a producer/consumer pool-forking library? Please let me know :) Sadly there is a criminally-small amount of Ruby Rinda documentation available online right now (most of it is for RingServers instead of TupleSpaces)

Check out the full forkify_pool method and let me know if you have any suggestions. Pool forking requires Ruby 1.9 right now because some of the Rinda stuff doesn’t work in 1.8.

How to run FastRI on Ruby 1.9.1

July 6, 2009

Alrighty, FastRI is a sweet program written by Mauricio Fernandez (of eigenclass.org, which is down currently for some reason) for doing RI (Ruby Documentation) lookups very quickly, it supports doing all sorts of neat things like running a DRb server for lookups and other cool things :)

Anyway, if you found this, you probably don’t want to listen to me blabber, you want to know how to get it running on Ruby 1.9.x, so I humbly present a patch!

Download the patch here (older version) version 2

Download the patch here, version 3.

First, download the FastRI tarball (version 0.3.1 is latest at the time of this writing) from rubyforge.

Here’s how to install the patch:

% tar zxf fastri-0.3.1.tar.gz
% cd fastri-0.3.1
% patch -p1 < ../fastri-0.3.1-ruby1.9.1.v2.patch
patching file bin/fastri-server
patching file lib/fastri/ri_index.rb
patching file lib/fastri/ri_service.rb
patching file lib/fastri/util.rb
patching file test/test_functional_ri_service.rb
% sudo ruby setup.rb

And you’re done! Now you’ll need to make sure to do a ‘fastri-server -b‘ to build the cache, and from there you can use FastRI the same as it was in Ruby 1.8, see:

[hinmanm@Xanadu:~]% qri String.each_codepoint
-------------------------------------------------- String#each_codepoint
str.each_codepoint {|integer| block }    => str
From
------------------------------------------------------------------------
Passes the Integer ordinal of each character in str, also known as
a codepoint when applied to Unicode strings to the given block.
"hello\u0639".each_codepoint {|c| print c, ' ' }
produces:
104 101 108 108 111 1593

Notes/Caveats/Disclaimers & Warnings:

This patch is a WORK IN PROGRESS, it may hang, crash, steal your wallet and/or delete files. I hacked it up in a day looking at FastRI because I really like using ‘qri’ for everything and was consistently annoyed by getting docs intended for 1.8. I assume no responsibility for these things.

Also, note that all tests don’t pass with this patch, I’m still working on it.

Feel free to leave any feedback for me :)

UPDATE:
New version of the patch that fixes doing a lookup on a base class instead of a method. so… version 3 right now. (link above)

UPDATE2:
I created a github project for fastri to build a gem, so you can install the gem (without patching!) using this command:

sudo gem install dakrone-fastri -s http://gems.github.com

Forkify 0.0.1 Ruby gem released, threadify with processes

June 24, 2009

I’m happy to announce the release of another tiny Ruby gem, Forkify.

Forkify is basically Ara Howard’s Threadify (minus a few features), but instead of using threads, it uses fork to create multiple processes to perform the operations on an Enumerable type. It was born out of the desire to have the forkoff gem work on Ruby 1.9.1 (which it isn’t currently).

You can get Forkify using RubyGems:

sudo gem install forkify

Using it is super-simple also:

require 'forkify'
require 'pp' # optional, just for this example
r = [1, 2, 3].forkify { |n| n*2 }
pp r

=> [2, 4, 6]

Another example demonstrating the time-saving feature of using forks:

[3:hinmanm@Xanadu:~]% time ruby -rforkify -e “5.times.forkify { |n| sleep(1) }”
ruby -rforkify -e “5.times.forkify { |n| sleep(1) }”  0.02s user 0.03s system 5% cpu 1.030 total

[3:hinmanm@Xanadu:~]% time ruby -r forkify -e "5.times.forkify { |n| sleep(1) }"
ruby -r forkify -e "5.times.forkify { |n| sleep(1) }"  0.02s user 0.03s system 5% cpu 1.030 total

You can specify the maximum number of processes to spawn with an argument to forkify, the default is 5:

[1, 2, 3, 4, 5, 6].forkify(3) { |n| n**2 } # This will spawn 3 processes at a time to process the 6 items

Here you can see sleeping for 5 seconds 5 times only takes slightly longer than 1 second (instead of over 5 if you hadn’t forkified it)

Forkify is available as a gem via rubygems, or you can check out the code here: http://github.com/dakrone/forkify/. It’s still beta-quality, so please let me know if you run into any issues with it.

P.S. 100th post, woo!

Nesting traps in Ruby with a quick monkeypatch

June 9, 2009

If you end up messing with traps a lot in Ruby, you’ll find that they don’t unbind when leaving function context, so you’re either stuck ‘ensuring’ that the trap is replaced by the old trap, or just dealing with it.

Well, here’s a quick monkeypatch for adding a method that will do all the ensuring/retrapping for you when you leave a function.

Here’s the code (click for github’s colorized version):

While the syntax for calling it (t.trapr_wrap "SIGINT", Proc.new { ... }, :foo) isn’t exactly clean, if you’re calling a lot of functions and only want a trap to be active inside, it beats having to repeat undoing your trap every time.

Update: I changed the code for better readability and because I was doing it a silly way. Now it takes actual arguments instead of just ‘*args’.

Building a Java dev environment with Eclim and Vim on OSX

May 11, 2009

As anyone who has done Java development will tell you, doing it without a java-specific IDE can suck. So, enter Eclipse and Netbeans, probably the 2 biggest java IDEs out there (among many).

But I don’t want to use Eclipse or Netbeans. I want to use Vim.

Enter Eclim, which is a way to use Eclipse’s wide array of features in Vim. Check out the site, it gives a better idea of how it’s used than I can. Unfortunately, only binaries for Linux and Windows are available, so we’re going to have to do this the hard way on OSX. Let’s get started.

The first thing we’ll need is Eclipse. I’m using Eclipse 3.4.3, which I downloaded, uncompressed and moved to /Applications/Eclipse (so the full path is /Applications/Eclipse/Eclipse.app, this is important for later).

Next, let’s grab Eclim from the sourceforge site, the tar.gz file (not the .exe or the .sh). I’m using Eclim 1.4.7. Untar and wait a second, we’ll need to grab something before we can build Eclim.

Eclim requires Ant 1.7.1 in order to build (OSX ships with Ant 1.7.0 instead), so download the Ant 1.7.1 binary for OSX from Apache’s sites, untar, but don’t worry about installing it.

Lastly, grab the latest Vim 7.2 tarball from vim.org. Unfortunately, Apple decided not to compile the system vim with ‘sign’ support, so we’ll have to roll our own version of vim.

Now, let’s begin:

First, we’ll need a folder for the vim plugins, which needs to be created manually or Eclim will complain:

[~]% mkdir ~/.vim/eclim

Next, compile the Eclim files from the eclim directory using the ant 1.7.1 binary. In this example I’m only compiling the ant and jdt plugins for Eclim, because the CDT and PDT plugins require other Eclipse libraries, and I only use Eclipse for Java development anyway. Be sure to change your eclipse.home setting if you didn’t put it in the same place as me:

[~/code/eclim_1.4.7]% ../apache-ant-1.7.1/bin/ant -Declipse.home=/Applications/Eclipse/ -Dplugins=ant,jdt

The Ant command will build and install the files at the same time, so afterwards you shouldn’t have to manually install any Vim or Eclim files.

Next, we need to recompile Vim with sign support, here’s how I compiled my version, make sure to keep the –enable-gui=no and –without-x options, or else vim will start X11 every time you run in:

[~/code/vim72]% ./configure --enable-gui=no --without-x --with-features=huge --prefix=/usr/local
[~/code/vim72]% make
[~/code/vim72]% sudo make install

Switch out the system vim for the one we just created:

[~/code/vim72]% sudo mv /usr/bin/vim /usr/bin/vim.mac.old

We’ll need some way to start the Eclim daemon that was installed, and eclimd doesn’t care for symlinks, so I created an alias in my .zshrc (or .bashrc if you use bash):

alias eclimd='/Applications/Eclipse/eclimd'

Next, we need to fix the /Applications/Eclipse/eclimd shell script, because Apple’s readlink command does NOT support the -f option, so change this line:

RESOLVED=`readlink -f "$0"`

To this:

RESOLVED=`readlink "$0"`

Now, after all that, start up eclimd:

[~]% eclimd

You should see something like this (screenshot):
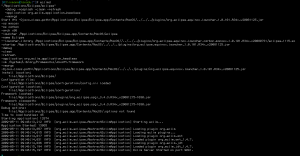
eclimd_started

Alrighty, now we can start Vim, give these two commands a try to see if eclimd communication can be established:

:PingEclim (Will output the Eclipse and Eclim version if everything is working)
:EclimValidate (You should get: “Result: OK, required settings are valid.”)

Hopefully you were able to get a connection. If not, leave a comment and I’ll try to help you out :)

Okay, so it’s set up, congratulations! Now what can you do with it, well I suggest checking out Eclim’s Java page to see what you can do, but the features I end up using the most are validation, completion and correction. Validation will validate the Java file every time you save it, marking the lines where errors in compilation occur. See the following screenshot (notice the red “>>” markers):
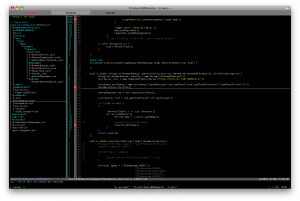
eclim_errors

Completion (through Ctrl+x-Ctrl+u) gives you the awesome completion that Eclipse has, like so:
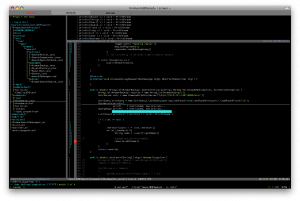
eclim_completion

Correction allows you to go to a line with an error marker, and have Eclipse suggestion a fix, just like it would in the IDE, to apply the fix, put the cursor on the red line and hit Enter:
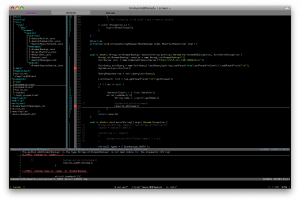
eclim_correction

Now go read all the documentation to see the neat things you can do :)

I usually end up doing the actual project management (adding files, adding external jars to the classpath, generating ant build.xml files and other gui-type stuff) from Eclipse still, but for the actual coding, I’m all about Vim.

Oh yea, one other thing I should mention, so Vim settings for your .vimrc that are really helpful for this:

If you use Supertab (tab-completion with tab instead of Ctrl+x-Ctrl+u):

" Supertab settings
" supertab + eclim == java win
let g:SuperTabDefaultCompletionTypeDiscovery = [
\ "&completefunc:<c-x><c-u>",
\ "&omnifunc:<c-x><c-o>",
\ ]
let g:SuperTabLongestHighlight = 1

And some Eclim .vimrc settings that I use:

" Eclim settings
" ,i imports whatever is needed for current line
nnoremap <silent> <LocalLeader>i :JavaImport<cr>
" ,d opens javadoc for statement in browser
nnoremap <silent> <LocalLeader>d :JavaDocSearch -x declarations<cr>
" ,<enter> searches context for statement
nnoremap <silent> <LocalLeader><cr> :JavaSearchContext<cr>
" ,jv validates current java file
nnoremap <silent> <LocalLeader>jv :Validate<cr>
" ,jc shows corrections for the current line of java
nnoremap <silent> <LocalLeader>jc :JavaCorrect<cr>
" 'open' on OSX will open the url in the default browser without issue
let g:EclimBrowser='open'

Enjoy!

Why don’t Christian writers license their work with Creative Commons?

May 7, 2009

Alright, non-technical, semi-religious post. If all you care about is technical stuff, skip reading this.

So I’ve had this nagging feeling every time I read a Christian book (other than the Bible), something that the author intended to inspire, impart knowledge, hold accountability and so forth, of why would the author want me to pay to hear this? I don’t understand why a Christian author, intentionally writing a book meant for a Christian audience, licenses his/her work in such a way that the book will only reach people who spend an amount set by the publisher and/or author, instead of a broader audience.

Now, let me set something straight. I haven’t written a book, I don’t know the entire negotiation process that goes on between the publisher and author. What kind of deals are brokered? I don’t know. Is there a secret ritual or rite of passage that occurs before given the go-ahead to write a book? I don’t know.

So where does that leave me? Empty speculation and argumentation about something I don’t fully understand the entire workings of. Welcome to the internet.

Let’s pretend you’re an author.

You have an awesome idea, inspiration touched you and you feel compelled to share that inspiration with the world. So, what better way than a book right? I mean, people still read nowadays right?

So you write, you write during your free time about something you’re passionate about, and (assuming you’re writing a Christian book, which is what this post is about) you want to share it with as many Christians as possible. So you sign on with a publisher to distribute, print and market the book. Let’s say your book ends up costing $14.95, which seems in line with where book prices for this sort of book are.

Now comes the hard decision. Will you as the author sacrifice your original intent to spread the word of your book to as many people as possible by having a barrier to (readership) entry of $14.95?

Because that’s what I feel like Christian authors are doing. Maybe they aren’t aware there is an alternative?

Take, for example, Shane Claiborne‘s book: The Irresistible Revolution. This is a book that, while it has its faults, I think would be beneficial for all Christians to read, so why the cost of $10.19 (on Amazon) for something that should be a work of service to the Christian community? Shane has a very anti-consumerist message in a lot of his books, so why even charge for the book at all? (I understand charging for a hard copy of the book because of printing fees, etc, but why not just post it free online as a PDF?) I know that Shane is not a professional, full-time author, so the money is not going to support him. Is the money going to charity? Great! There is still a win-win situation for both parties: licensing the book under Creative Commons.

There a few different licenses to choose from. Shane could go with Attribution Non-Commercial No Derivatives for the license, which would mean he would be attributed as author of the work, someone else could not sell it and no derivatives could be made of it. However, it could be freely distributed and copied, which is exactly the point of writing a Christian book to me.

This doesn’t preclude making money (if so desired, for charity or supporting the author) from the book. Creative Commons allows for dual-licensing a work, so Shane could enter into a revenue generating license (i.e., with Zondervan, the current publisher of Irresistible Revolution), while preserving the disseminating power of a CC license. This of course assumes Zondervan would be up for that idea, I hope they would.

It’s not like it hasn’t been done. Look at authors like Cory Doctorow, whose novels are both published by Tor and released with CC license on his website, to encourage sharing of his works. Take “Someone Comes to Town, Someone Leaves Town” for example, I purchased a copy at Barnes & Nobles (for ~$10 I think), but the entire book is also available to anyone who wants to download it from Doctorow’s site.

The point is, writing a book meant to be widespread can be assisted by licensing under Creative Commons. And, since one of the points of being a Christian author is to reach a large Christian audience with your message, I have to ask, why don’t more Christian authors release their books under CC licenses and then dual-license with another license? Did we focus on the wrong goal of writing a book for Christian audiences (by a Christian), that is, making money?

Shouldn’t we be focusing on the message and not the monetary gain?

NOTE: If you leave a comment, give me a day or so to reply to you, I normally think about the comment for a while before responding, I haven’t forgotten about your comment.

Labview_rails and development motivation

March 19, 2009

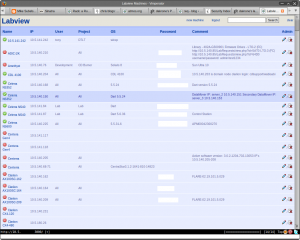
Alright, my wife has been trying to convince me that I should share the one-off I wrote for our internal lab management, so today I finally got around to fixing the last *major* bug in the system, and putting it up on github.

Yep, that’s right, you too can have a quasi-specialized lab management Ruby on Rails application to manage all the machines in your lab!

Labview

What I do hope that this does is inspire me to become a better Rails developer. I’ve been using Ruby for over a year now, I an extremely confident in my Ruby skills, and I’ve made many things I consider useful for myself and maybe for other people. Labview was my first real Rails project, and by first “real” project, I mean first one that I use every day, other people in my office use, and I feel halfway confident releasing it for people to see.

On the other hand, the testing is lacking, documentation is poor and some of the authentication systems are kind of hacked together. I’m labeling this one a “learning experience” and moving on. I probably won’t commit any more to Labview (but that doesn’t mean I wouldn’t be open if someone wanted to fork it on Github…) simply because right now it works well enough.

Oh yea, and I can’t thank my wife Delilah enough for the better visual design. You should have seen Labview back when it was hacked together in PHP. It was a pastelle assault on the eyes.

Anywho, Labview is a really simple project, and a great start for someone interested in getting into Rails. I’ve learned a lot from developing it, and a lot of the knowledge has immediately been applied in some other projects I’m working on. Perhaps the next Rails app I work on will conform for test-driven-development? I’m looking forward to other projects I have ideas for in the future :)

I’m also excited about taking a look at Sinatra, since Atmos did a talk on it last night at the Ruby meetup. Specifically, I’m interested to see if I can build a ssh-tunneling server using only Sinatra and Ruby over HTTP…

 
Powered by Wordpress and MySQL. Theme by Shlomi Noach, openark.org